
MCV-4000
Linear, Angular, Straightness, Flatness & Squareness Calibration
OPTODYNE's MCV-4000 Linear, Angular, Straightness, Flatness, and Squareness Calibration System calibrates CNC
machine tools, CMMs (Coordinate Measuring Machines) and other precision measurement machines and stages. The unique dual-beam design provides a rapid
means to measure the surface flatness of surface plates and the linear and angular errors of machine axes. The MCV-4000's Quad-detector and optical
square also allow for the precision measurement of squareness and straightness.
OPTODYNE's machine calibration systems are based on our proprietary and patented Laser Doppler Displacement Meter (LDDMTM) technology. The total system is compact, providing easy, convenient storage and transportation. Easy setup procedures reduce overall machine calibration time. Calibrated and traceable to N.I.S.T., the OPTODYNE laser calibration system maintains high accuracy as well as lower costs.
The MCV-4000's dual beam laser design provides the user a simple, easy-to-operate linear and angular capability in a single instrument. It's like "having two interferometers in one". One beam monitors linear positioning while the other beam monitors angular data. The Windows" software, running on any IBM compatible computer, is user friendly and designed to collect and ana- lyze data in accordance with a variety of industry standards.
MAJOR FEATURES AND BENEFITS:
• Simultaneous linear and angular data collection
• Compact and lightweight
• Easy to align and set-up
• Automatic data collection
• N.I.S.T. traceable laser accuracy
• No tripod and no interferometer
• On-the-fly angular measurement capability
• Automatic environmental compensation
• Supports NMTBA, VDI, ISO, and ASME B5.54 standards.
MAJOR APPLICATIONS:
• Calibration of CNC machine tools, CMM's, Leadscrews, and DRO's
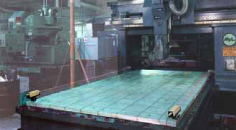
• Calibration of surface plates
• Checking pitch/yaw angles and straightness of machines
• Squareness of machine axes
• Quality control maintenance
• Ultra precision positioning
• Calibration of CNC machine tools, CMM's, Leadscrews, and DRO's
• Calibration of surface plates
• Checking pitch/yaw angles and straightness of machines
• Squareness of machine axes
• Quality control maintenance
• Ultra precision positioning
Specifications:
The MCV-4000 Machine Calibration System features environmental compensation sensors. These devices automatically adjust the collected data for air temperature, barometric pressure and thermal expansion of the axis being calibrated. With the special dual-channel processor module and dual-beam laser, the operator can simultaneously collect linear and angular data.
The Windows™ software package included with the MCV-4000 also enables the operator to collect surface flatness data. Using the Moody method, flatness data can be converted into a surface height map.
CONFIGURATION:
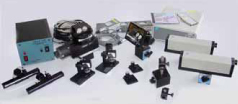
Dual-beam laser head |
L-104 |
Processor module with RS-232 Interface |
P-210 |
Dual retroreflector |
R-103 |
Alignment kit (flatness and angle) |
LD-32 |
Adapter platform for laser head |
LD-14 |
Surface flatness kit |
LD-24 |
Quad-detector |
LD-42 |
Optical square |
LD-16 |
Linear data collection/analysis software |
W-102 |
Angular/flatness data collection software |
W-103 |
Squareness data collection software |
W-104 |
12ft cable set |
LD-21 |
Magnetic base (for mounting assistance) |
LD-03 |
1" diameter, single beam bender |
LD-15A |
CAPABILITY:
Laser Stability |
0.1 ppm |
Linear Accuracy |
1 ppm (typical) |
Angular Accuracy |
±0.2% |
Quad-detector Accuracy |
0.0001 "/ft (0.008µm/m) |
Linear Resolution |
1 microinch (0.01µm) |
Angular Resolution |
1 µrad (0.2”) |
Flatness Resolution |
1 microinch (0.01 µm) |
Squareness Resolution |
10 microinch (0.1 µm) |
Linear Range |
33-ft (l0m) |
Angular Range |
16-ft (5m) |
NOTE: |
Extended ranges available |
Squareness Range |
16-ft (5m) |
Maximum Angular Sweep |
± 10 degrees |
Slew Rate |
72 IPS (1.8 MPS) |
Squareness Deviation |
Squareness Deviation |
Power |
90-230 VAC, 50-60 Hz |
Options:
Various hardware and software options available. Please discuss the options with your authorized OPTODYNE sales representative.
Various hardware and software options available. Please discuss the options with your authorized OPTODYNE sales representative.


